Choosing a lunch bag around its containers
Start with the filled containers, then check the space for any cooling items and the way the bag will be carried.
The container is the starting point
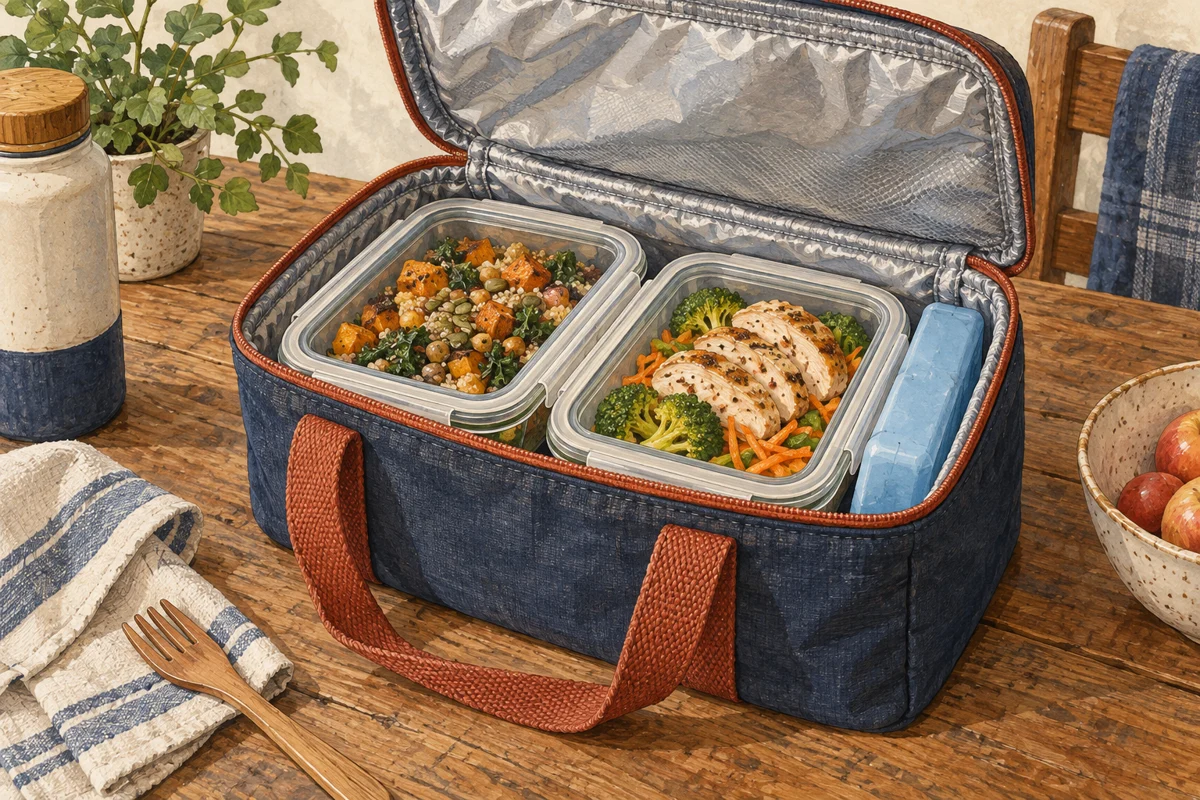
Pack the lunch containers you normally use, with their lids and clips in place. Measure their combined footprint and height rather than buying a bag by its stated litre capacity alone. A tall narrow bag and a low wide one can hold the same volume while fitting very different lunches.
Allow room for any cooling packs required by the food-storage plan, plus cutlery and a napkin if carried. Do not squeeze a lid or release clip against the wall of the bag to make everything fit. Containers should sit in the orientation their makers intend, especially when liquids are involved.
Check whether the bag opens widely enough to remove the bottom container without tipping the rest. A front flap may give different access from a narrow top zip. Try the arrangement on a table before imagining how it will work on a crowded desk or during a short lunch break.
Insulation is not a complete storage plan
An insulated bag slows heat transfer, but it does not establish a universal safe holding time for every food. The starting temperature, contents, cooling method, weather and journey all matter. Follow appropriate food-storage guidance for the meal and use refrigeration where required.
Do not interpret a bag's marketing photograph as proof that a particular lunch can remain unrefrigerated all day. A photograph shows the container arrangement, not a measured food temperature. If the journey and destination do not support the food's needs, change the plan rather than relying on a thicker-looking lining.
Keep the bag closed as appropriate during transport and away from avoidable heat. Separate it from documents or electronics if a leak would cause damage. A wipeable interior can help with cleaning but does not guarantee that seams or zips contain every spill.
Look closely at the inside
Inspect corners, seams and the area around the zip. Smooth accessible surfaces are easier to check after a spill than narrow folds hidden behind fixed pockets. Ask whether the lining can be turned out or whether cleaning is limited to wiping in place.
Read the actual care instructions before putting the bag in a washing machine. Padding, reflective layers and stiffeners may change what is permitted. The fabric visible on the outside is only one part of the construction.
Choose a carry handle or strap that suits the rest of the journey. If the lunch bag goes inside a larger bag, compare its filled size with that space too. A comfortable separate handle is less useful if it leaves you carrying one more item than you can manage.
Empty it on arrival home
Remove containers and any cooling items promptly. Deal with food residues and spills using the bag manufacturer's cleaning method, then leave the bag open to dry fully. Check the folds and seams rather than only the centre of the lining.
Inspect damaged areas that are becoming difficult to clean. If a lining is peeling or the closure no longer works, consider whether the bag remains suitable for its intended use. Keep the next day's packing simple: clean containers, a dry bag and a food-storage plan appropriate to the actual meal and journey.